It’s Carolan’s first Christmas and so the perfect time to regale you with a carol, in this case Gustav Holst’s beautiful tune for ‘In the Bleak Midwinter’.
Recording this provided us with a good opportunity to begin to explore how best to capture Carolan’s voice. It seemed best to try this out at home first before venturing into a professional set-up, so Steve heads upstairs to his man-cave for a long Sunday afternoon of messing about with mics and things as well as grumpily shouting at anyone who dares to make a noise nearby (including neighbours, wildlife and passing vehicles, although at least one of these manages to sneak onto the recordings anyway). Adrian then takes on the task on mixing and mastering in his own cave.
Here’s a second recording, this time of O’Carolan’s Concerto (also known as Mrs Power), one of Turlough O’Carolan’s better known pieces.
And now a warning. The rest of this post describes how Steve and Adrian set about recording the sound track for these videos. It includes way too much fine detail about mics, mic positions, effects, mastering and is frankly all rather dull. However, it could also be useful if you ever want to record Carolan for yourself and so forms an important part of its digital footprint (at least that’s our excuse). Most of you will want to stop reading at this point, grab a mince pie and a glass of sherry and perhaps even give a second listen to ‘In the Bleak Midwindter’.
Happy Christmas!
Carolan
Notes on recording
Still reading? Well don’t say we didn’t warn you. So here’s how we set about capturing the sound of Carolan using a low-budget home set up.
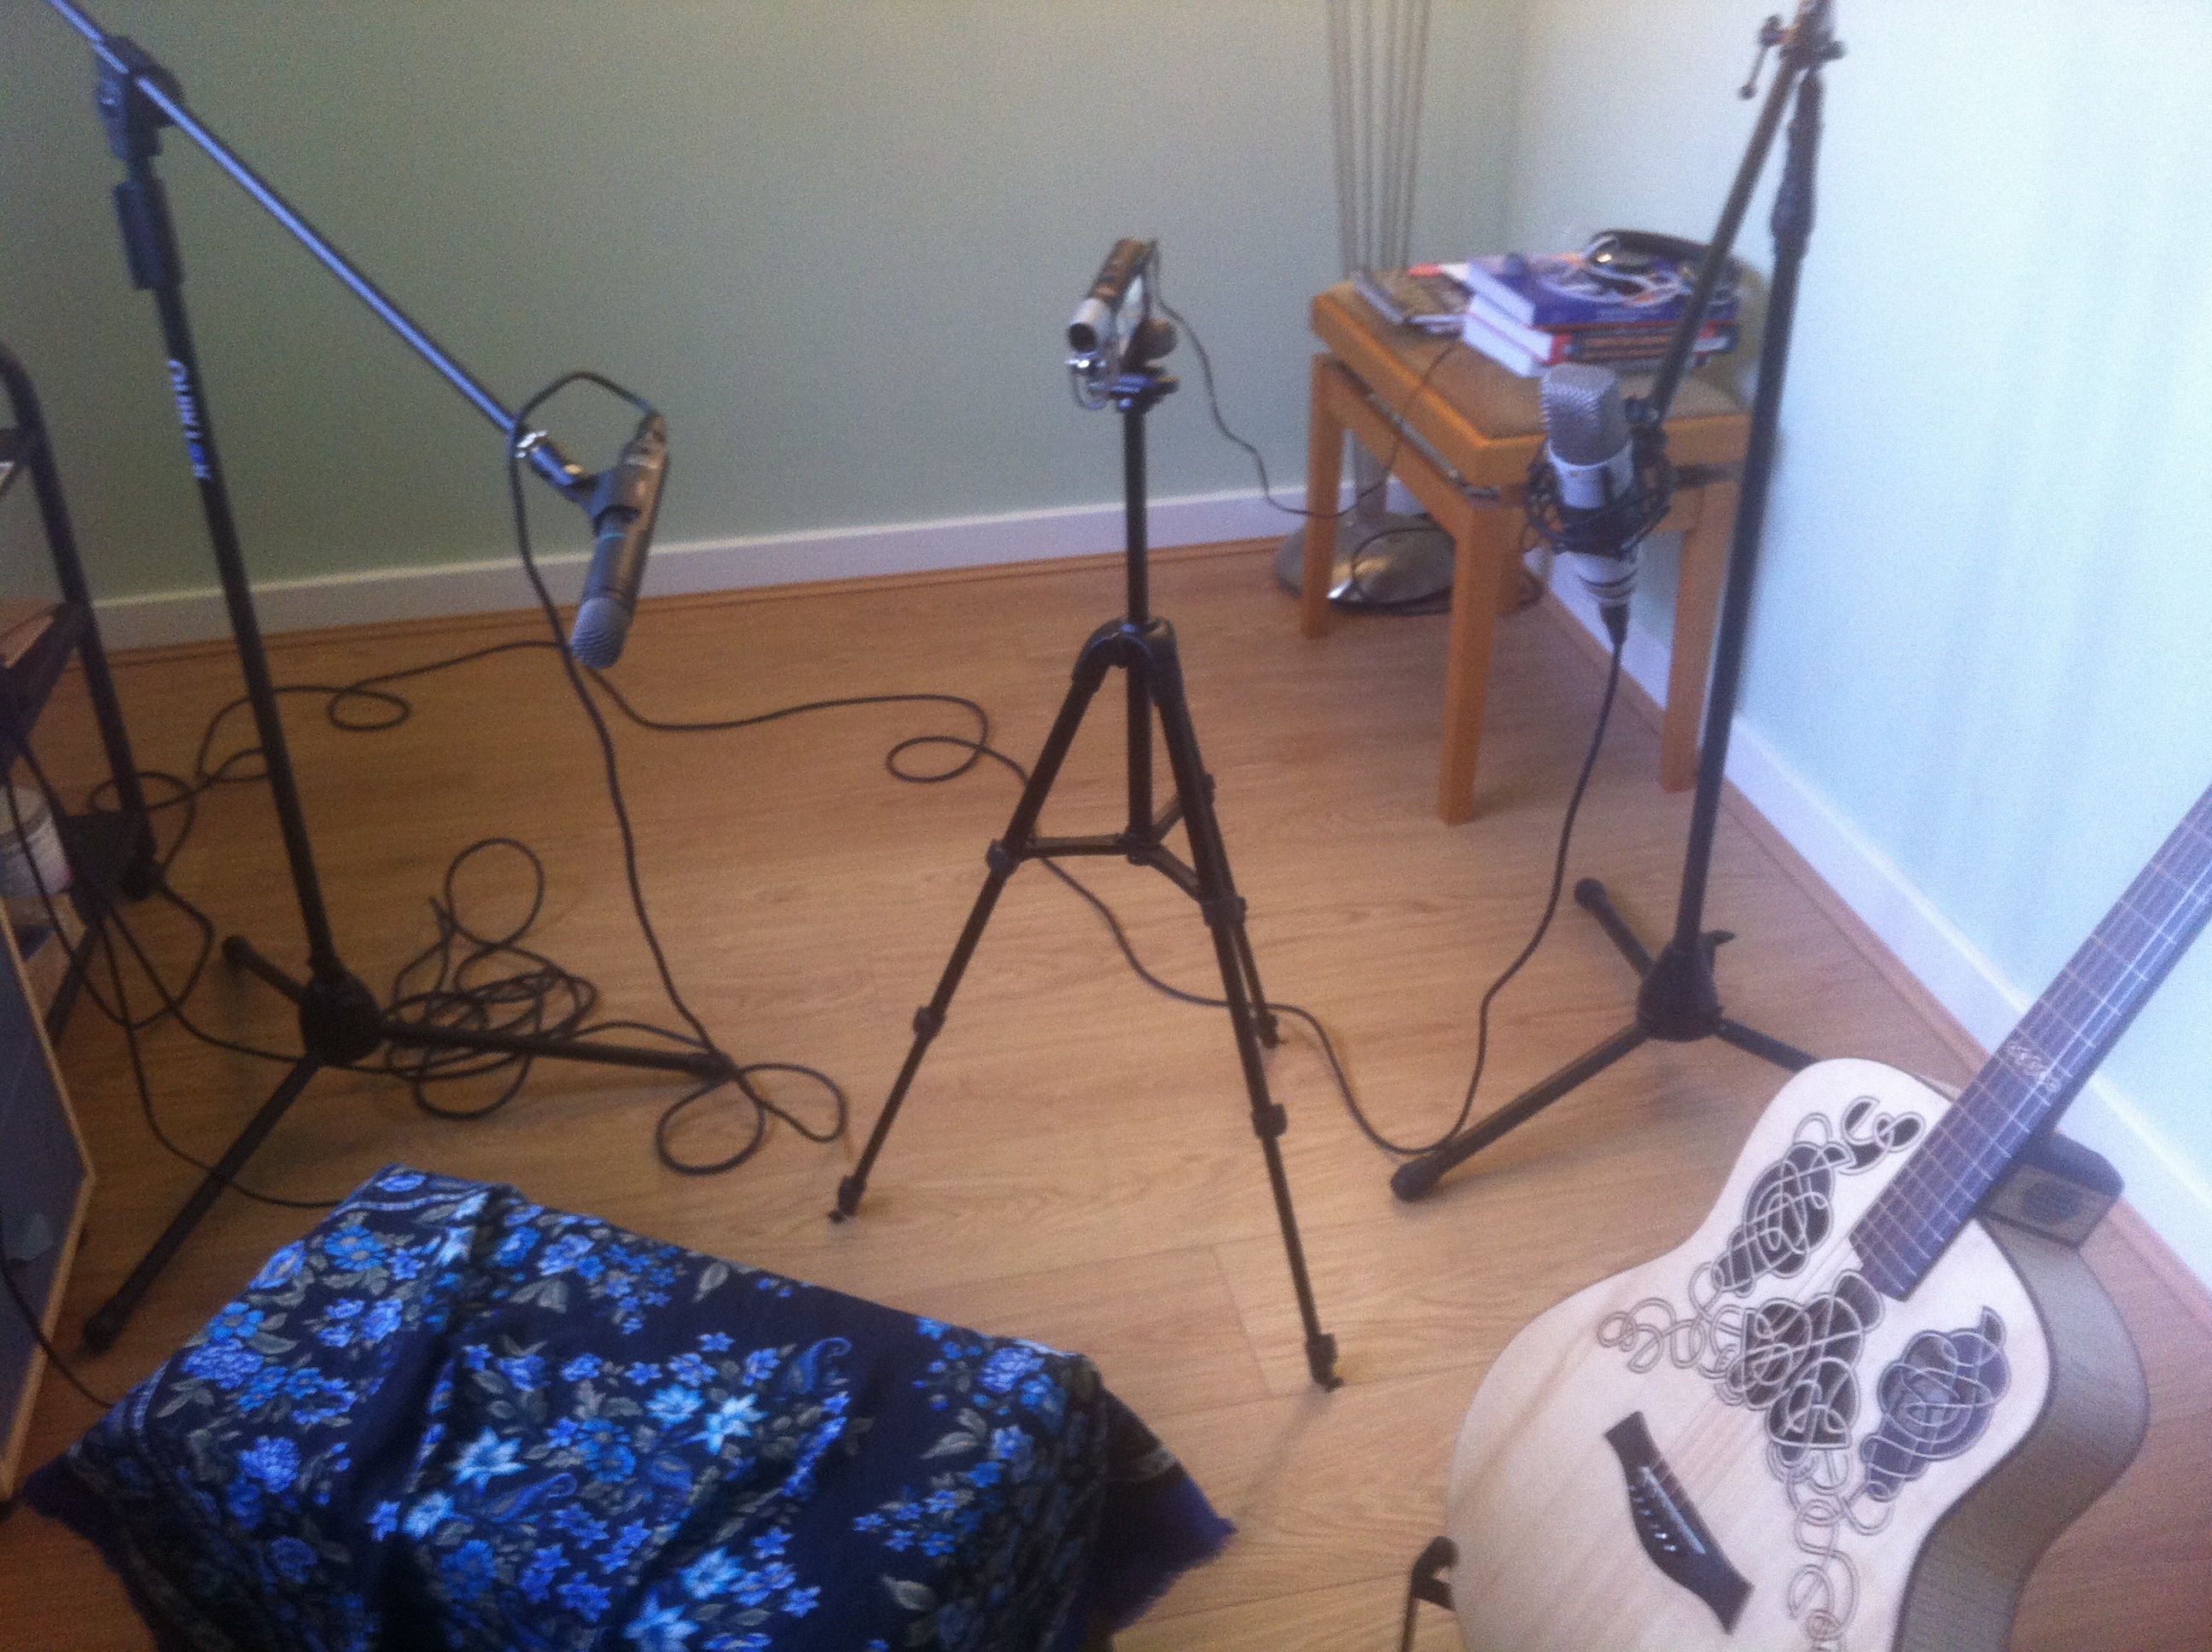
Given that there are only two half-decent budget mics available in the man cave, and that these are quite different in character, the best option seemed to be the classic approach of a widely separated pair to try and capture a broad stereo field. An AKG C1000S was positioned pointed directly at the 14th fret (left of the figure below) while a Rode NT1 was positioned somewhat further back and pointed generally in the direction of the lower bout (right of the figure). These were then passed through an AKAI EIE analogue to digital converter and from there into Logic Pro running on a Mac. Finally, our Sony video camera was positioned between the two mics to capture the visuals. Anyone still awake out there?
All that remained was for a very large number of takes of each track. Best to draw a veil over how many other than to say that Steve is definitely not a ‘one take wonder’.
Notes on mixing
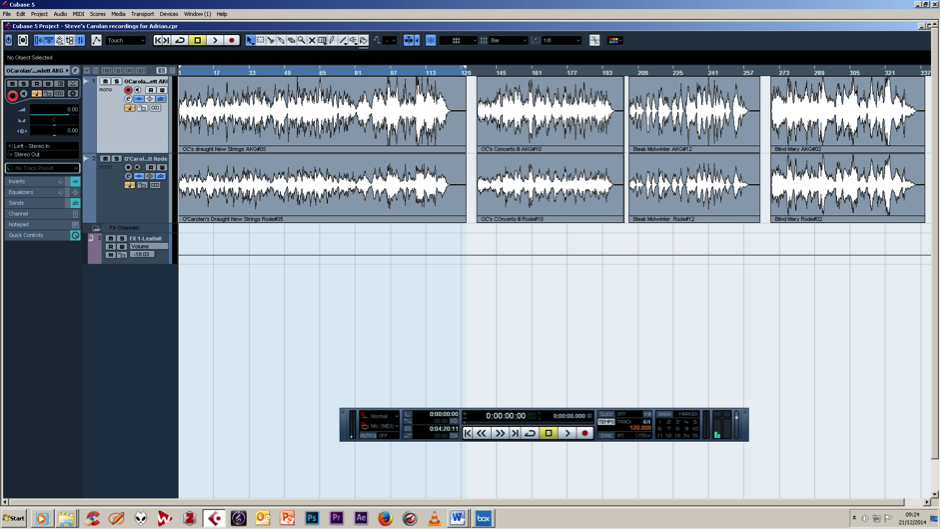
Adrian had volunteered to take on the task of mixing so Steve emailed over the raw recordings using the Open Media Format. The mixing was then done in Steinberg Cubase 5. The is the main layout screen showing all four recordings across the two microphones. AKG on top, the Rode below…
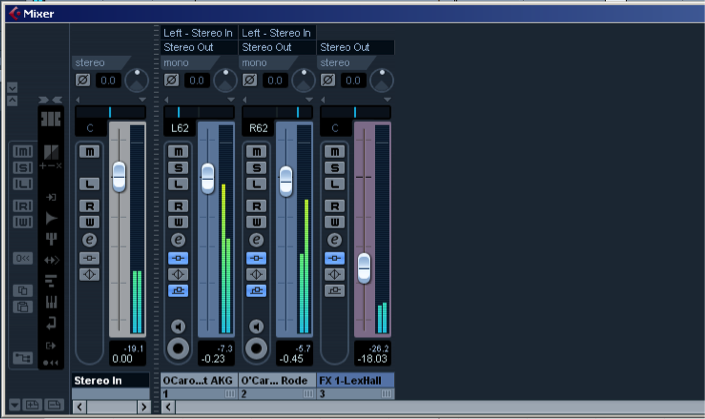
The Mixer window below shows the input level of the raw recordings on the far left. The middle two channels represent the two microphones. The AKG microphone is panned 62% to the left and the Rode 62% to the right. The fourth channel strip on the right shows the return level of an effects send channel for a reverb …
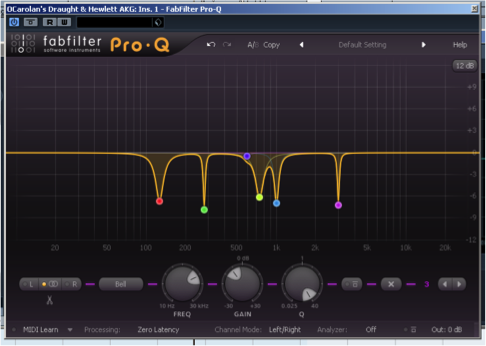
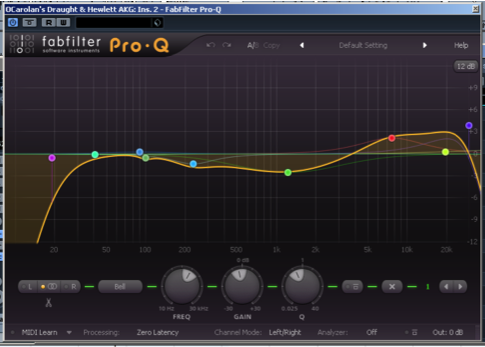
The following shows the channel strip for the AKG microphone. A range of processing has been undertaken (left hand side shows inserts from processing effects) …

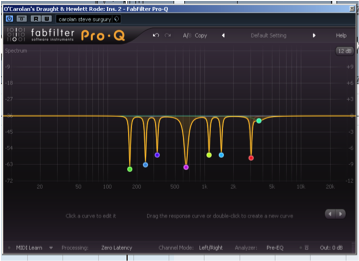
The first stage of EQ was surgical, meaning that any prominent resonances or frequencies captured on the recording that come from a combination of the guitar, recording room and microphone were reduced. A very focused bell curve was used to highlight a particular frequency …
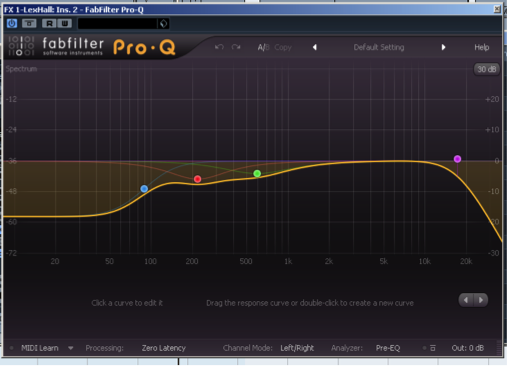
The second stage of EQ concerned the more general shaping of the sound. This AKG recording pointing towards the guitar’s neck was rich and full. It did not require any boosting of the low end. The mid-range was reduced to remove some of the guitars inherent mid-range richness and the high-end boosted to brighten the sound …
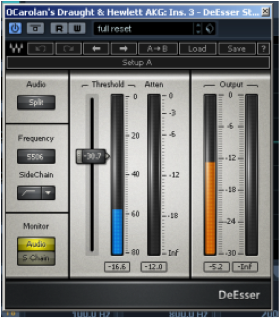
In the next stage of EQ a DeEsser is typically used on vocals to reduce sibilance sounds, but here it was employed to reduce some of the string ‘squeak’ that results from the hands sliding across them…
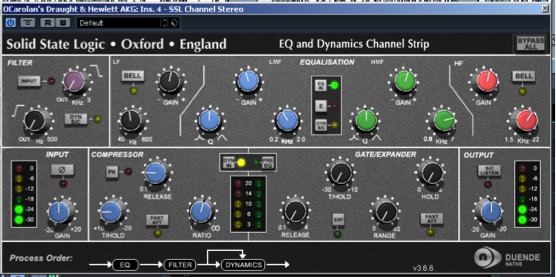
Finally a compressor was placed in the chain featuring:
- Slow attack
- 1:7.2 ratio
- Fast release time
Minimal compression was applied here, the intention was to just capture and pull down the level of the high peaks. So the majority passes through un-compressed.
A ‘hall’ reverb was set up on an effects send. This was to add some larger reverberation than that captured from the small room Carolan was recorded in. A reverb time of just over 1.5 seconds with a 20msec pre-delay were the basic settings used. The same reverb was added across both microphones.
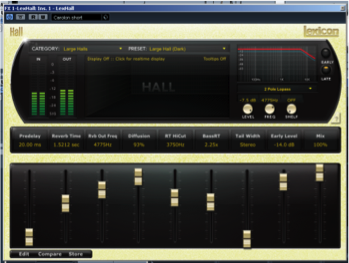
A further EQ was then applied to the reverb send effect. The purpose of this was to reduce the amount of reverb around the lower frequencies. If this is not done, the reverb can emphasis them these frequencies and the boominess created can muddy the low end of the mix. You can see that the EQ basically pulled out the low and lower-mid frequnces. There was also a high-shelf which is just reducing the very high-end reverb ‘sizzle’. In a sense the aim here was to apply a rich amount of reverb to the recording, but to reduce the prominent frequecies that will make the reverb stand out.
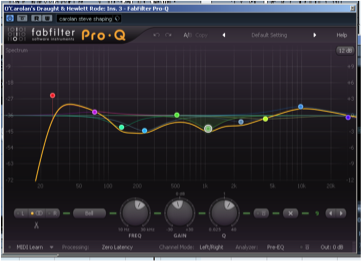
The same set of processing was applied to the Rode microphone, but adjusted to suit the sound captured. A little more surgical EQ’ing was required on this microphone, as its placement captured more the natural qualities of the room, which gave it a ‘boxier’ sound.
This microphone recording was richer in middle and high frequencies compared to the AKG. Thus, it did not need so much high end adjustment, but the mid and low-range frequencies necessitated more shaping, to add depth and reduce boxiness.
The track was then exported from Cubase with the above processing applied.
Notes on mastering
The exported stereo mix from Cubase was then mastered in Steinberg Wavelab.
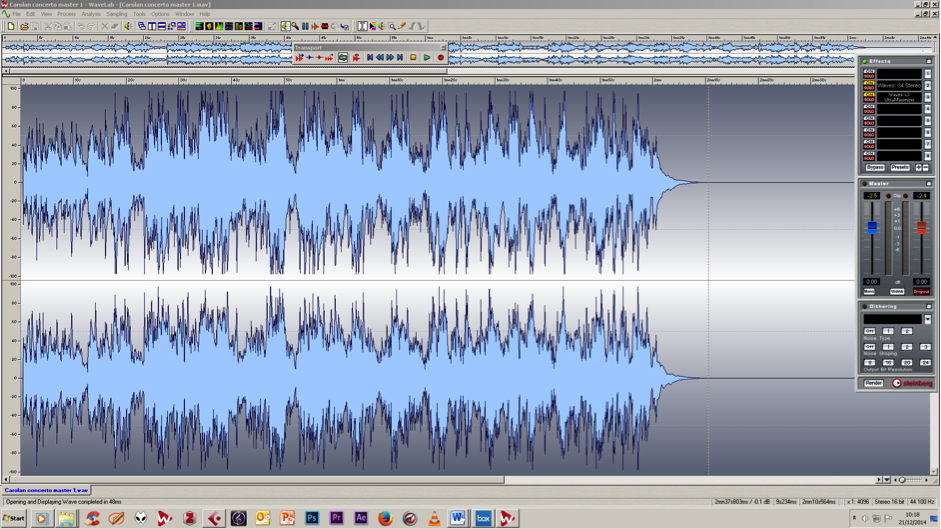
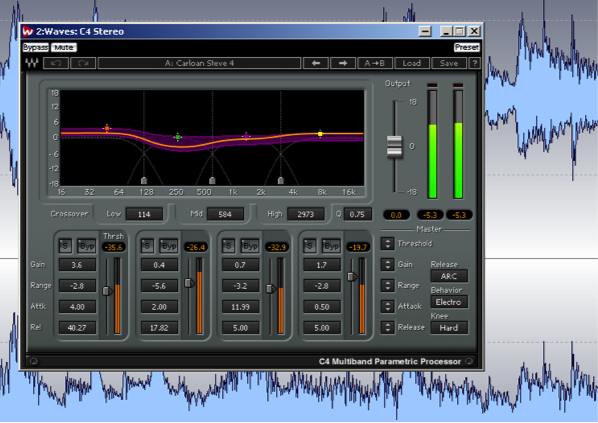
Two stages of processing were done here. First, a multi-band compressor was used for a final shaping of the stereo mix. A multi-band compressor (4 bands in this case) can be set up to compress particular bands of frequencies. So, it acts like a compressor and as well as an EQ. For instance, if you compress a band of low-end frequencies, then these are then reduced in dynamic level, so change of the global EQ of the sound. Here, a little slight boosting of the very low and high frequencies was applied, alongside a reduction of the lower-mid / higher low-end frequencies . This process seemed to smooth out the recording, making it less immediate and more balanced.
The final stage of the processing was the application of a limiter to both boost the overall level of the recording and limit any remaining peaks to stop the recording from ‘clipping’ (where the level pushes above 0db and distorts)

This processing was then rendered and exported as a wav file 44.1hz and 16 bit resolution.
As a final note, the limiter used here also addresses the ‘dither’. The original recordings were captured at 24 bit resolution and processed as this along the mixing and mastering chain. Traditionally, audio files are exported for consumption at 16 bit (CD ready). Dither is a process that adds low level noise to the sound file, to mask, or cover up quantisation errors that result from converting higher resoultion recordings (24 bit) to lower level exports (16 bit).
So there you are that’s how Steve and Adrian captured the sound of Carolan at home. In a future post we’re going to venture into a more professional performance space and try some recording time there.
Is anyone still reading? Really?? At Christmas! Perhaps it’s time to go open your presents. Maybe Santa has brought you some mics, or recording software, or even a new guitar. Have a good one.

Reblogged this on stevebenford and commented:
A christmas carol for you. Have a good one!
LikeLike
Pingback: 72. DAADAE – Carolan Guitar
Pingback: 73. Turlough – Carolan Guitar
Pingback: 77. Scan my Axe – Carolan Guitar
Pingback: 89. Dexter – Carolan Guitar
Pingback: 100! Centenarian – Carolan Guitar