One way for bands to continue to make music together during lockdown is to make ‘tiled’ videos in which their members appear to play together on screen, even though their individual parts were actually recorded separately. These resemble the live video conferences with which we have all become only too familiar over the past months, but are actually pre-recoded and carefully edited to appear as if live. Such videos have become a familiar feature of social media of late and Carolan is no exception, having been involved in making this video with the Beeston Ceilidh Collective who we last met at the Oxjam ceilidh back in Post 70 (and how long ago do Ceilidhs seem now!).
Producing these kinds of videos can be quite tricky, especially when everyone is separated and working from their own homes, and so here are a few tips based on our experience. A key early step is to record a guide track that everyone can play along to when they record their individual parts.
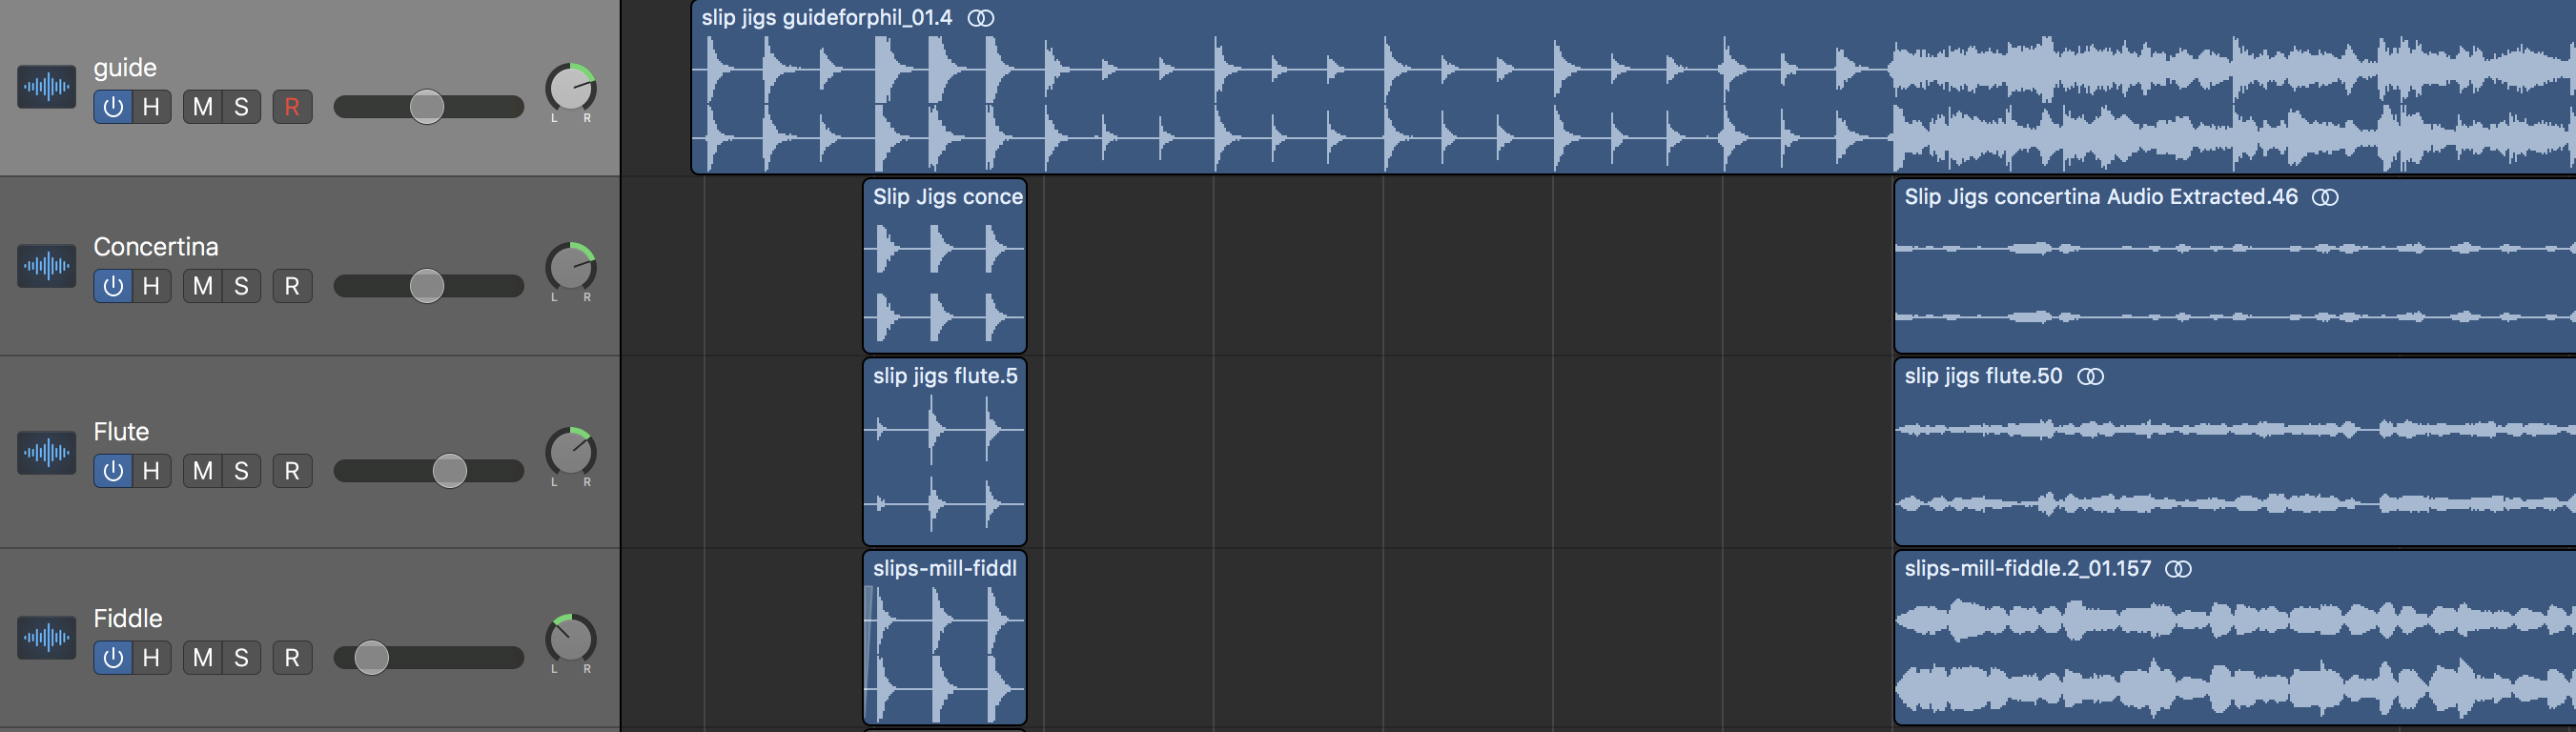
It becomes much easier to synchronise these individual videos during subsequent editing if: (i) the guide track can feature several audible ‘claps’ at the start and (ii) each person who records their own part can then clap along on the last few of these. The resulting claps show up very clearly as spikes in an audio waveform in an editor and so make it easy to visually line up the different videos parts in the editing software.
A further key question is whether this guide track will appear in the final edit? Is it is the first proper part to be played or will it eventually be discarded? If the former, then you need to be careful about the sound balance. For example, if a voice and guitar sound balanced in the guide track, then the voice may be lost as more instruments are added later on. If the latter, then you can worry less about the balance and also add a click-track. Here’s the throw-away guide track for the Slip jigs, featuring 6 claps at the start (because it’s in compound – 9/8 – time, along with a metronome.
And here’s Carolan’s rhythm part that was recorded along to this …
And below is how the audio waveform looks in the DAW. The first line shows the guide track audio waveform with its six claps, metronome then music coming in. The next three show different instruments, each starting with three claps that are synchronised with claps 4, 5 and 6 from the guide so that their music comes in on time (the intervening audio has been deleted to tidy it up). The same technique can be used to synchronise the different video parts in the video editor.
These basic tips aside, a more interesting question is whether all of the parts are pre-planned? Is the band is playing something that has already been arranged, or is the material is being composed afresh with each band member throwing in their own ideas which then need to be arranged in the final edit? Our Slip Jigs video falls into the second camp, with us arranging the tunes as we stitched together the various parts. It was an interesting and creative process, and one that involved some serious ‘head scratching’ (as Andy our Bodhran player gently put it) during editing.
We first assembled and reviewed the individual video parts and then separated out their audio parts, exporting them into into a digital audio workstation (Logic on our case) where we arranged and mixed the final track to sound how we wanted it.
Once the final audio track was mixed, we headed back into the video editing suite (Premiere Pro in our case) to edit the tiled videos to fit the final arrangement. This involved fading out players at points when they could not be heard, only to fade them back in again later on. This turned out to be complex and tricky production job that required us to construct a shared picture of the arrangement of the track (especially as video editing was being done by a team of two of us which required extra coordination). Here’s an overview of the whole arrangement …

And here’s a close up of the arrangement of the final tune showing how different instruments appeared and disappeared every four bars …

We also experimented with various visual treatments, alighting on the idea that we would fade them to a shadow rather than completely removing them. Finally, we added in some static images of the band playing live, showing these in colour while rendering the musicians to black and white. (to me it speaks of the contrast between the vibrant experience of playing live together before COVID compared to the greyness of lockdown, but Im probably overthinking it).
Anyway, we’re way way down in the detail here. The bottom line is that it’s pretty complex. While there are and there are no doubt other – probably better – ways of making these kinds of tiled videos, we offer two takeaway lessons from our own experience for those who wish to make their own:
- make a guide track and use the clapping technique (and a metronome if you’re willing to throw the guide away) to help synchronise all the video parts – it really makes life so much easier; and
- consider whether the video editing leads the audio or the other way round. We opted for audio first, which gave us lots of creative control over the music, though did require some serious head-scratching in the video editing. All part of the fun!
Happy recording and editing!

Pingback: 92. Dusty Windows – Carolan Guitar