The team has been living with Carolan for a short while now, giving regular demos to a number of people in different settings and observing what happens when they scan the codes. So, we felt it was time to reflect on the technical aspects of embedding the codes into the guitar and the lessons learned for luthiery, and to summarise as to how well the guitar’s Aestheticodes stand up to being scanned?
Right from the start of this project we knew we were venturing into uncharted waters; by using woods, inlay, engraving and sound holes as part of the codes we only added uncertainty and risk – but that’s all part of the research and of course the fun! We tested as best we could throughout the design and build process as we discussed in earlier blog posts, such as 4. Questions, 6. Etchings and 11. Mock-up. Despite all the testing, however, none of us knew how well – or if – the codes would scan until the guitar was constructed and the woods fully finished and waxed. During the period preceding completion team members were observed holding their breath, crossing their fingers, praying, wearing Shamrocks, avoiding black cats and wishing Carolan to ‘break a leg’ (or should it be a string in this context?).
So, what have we learned so far …
Well, let’s start at the back of the guitar. Being the largest code we were confident that it would scan well and it does just that. The testing that Liming undertook (see post 11. Mock-up) on printed versions seems to have transferred over to the finished guitar. The codes can be scanned effectively up to a distance of 4-5 metres. As noted during testing, the make and model of the mobile phone handset impacts noticeably on scanning success; newer handsets with better quality cameras and lenses faring much better than their older counterparts. Presumably, as mobile devices continue to improve over time the guitar should scan more robustly and at greater distances. However, there are some mumblings within the team as to whether mobile cameras will become too sensitive, and will therefore pick out all the inconsistencies of wood grain, inlay and construction that will negatively impact on the scanning process. Well just have to wait and see!

The large code on the back panel
Next, we move up to the headstock code. This was the only code to be engraved, filled and finished prior to the guitar’s full construction. Nick used a mixture of Ebony dust and resin to do the inlay, which gave it a very dark and consistent fill. During testing the code scanned consistently well, but on the finished guitar, however, it is proving tricky and often requires some patient experimentation. There may be a few reasons as to why this has changed. First, we did not consider the little bit of excess string that pokes out of the tuners. If these hover over the code they can interrupt the shape of the code the app sees. Second, the code sits very close to the tuners and sometimes the app joins the shape of the tuning pegs into the shape of the code. It may also be that the reflection off the shiny surface of the brass tuners also affects the app. And finally, we’re currently looking into issues of depth and camera focus. It maybe that the mobile phone camera focuses on the tuning pegs that sit proud of the headstock rather than on the code.

The small code on the heel has proved interesting. This was the code we were most concerned about during the construction process as it was the smallest, with the most delicate patterning. In response to this we returned to Liz’s original design and thickened up the internal lines of the Celtic knot as best we could. We then engraved it onto a piece of flamed Maple and Nick tried filling the engraved areas with the Ebony dust and resin mixture he used for the code on the headstock. Unfortunately the mixture bled through the thin wood lines of the knot, breaking the code’s shape. For our second attempt we tried laser cutting wooden inlay from Indian Rosewood to fill in the engraved areas. Unsurprisingly, Nick had is work cut out for him trying to place the small, delicate inlay into the engraved areas without breaking it, but it has proved surprisingly effective. This code scans well, only strong shadows can foil it!
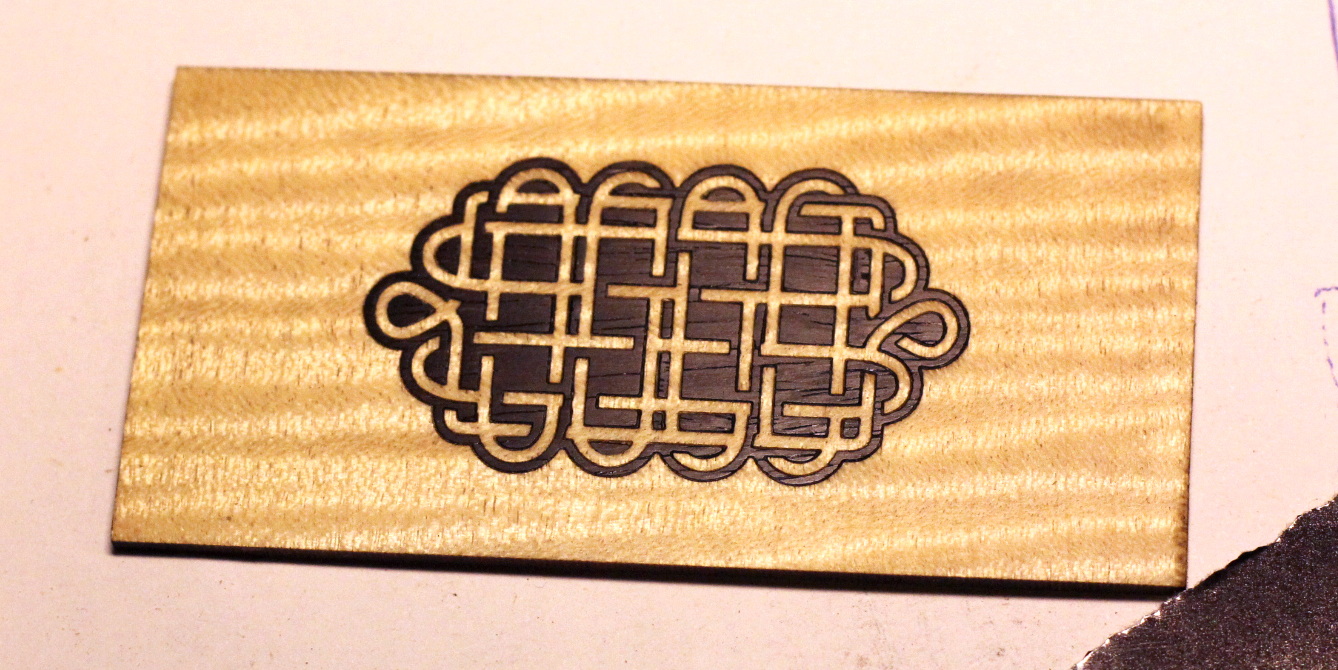
Very fine and delicate inlay on Heel code
The 12th fret code, being the simplest design of them all (code value: 1:1:1:1:1) scans very well …

… as does the code in the removable sound hole on the top side of guitar. This code, as well as those on the soundboard, that utilized sound holes as part of their design represented a significant risk and it would have been an easy decision not to pursue this approach. But the sound hole on an acoustic guitar is a significant feature and one that we felt afforded creative and inspiring opportunities to embed Aestheticodes into the function of the instrument, so it was absolutely a risk worth taking. Obviously, we weren’t sure how much light would shine through the holes and reflect off the inside. To scan these sound hole codes the holes need to be viewed by the app as dark areas, so any light that disrupts this will potentially break the code. Fortunately, the cut out sections of this code on the top side are small and not a great deal of light reflects through, therefore the app scans it well.
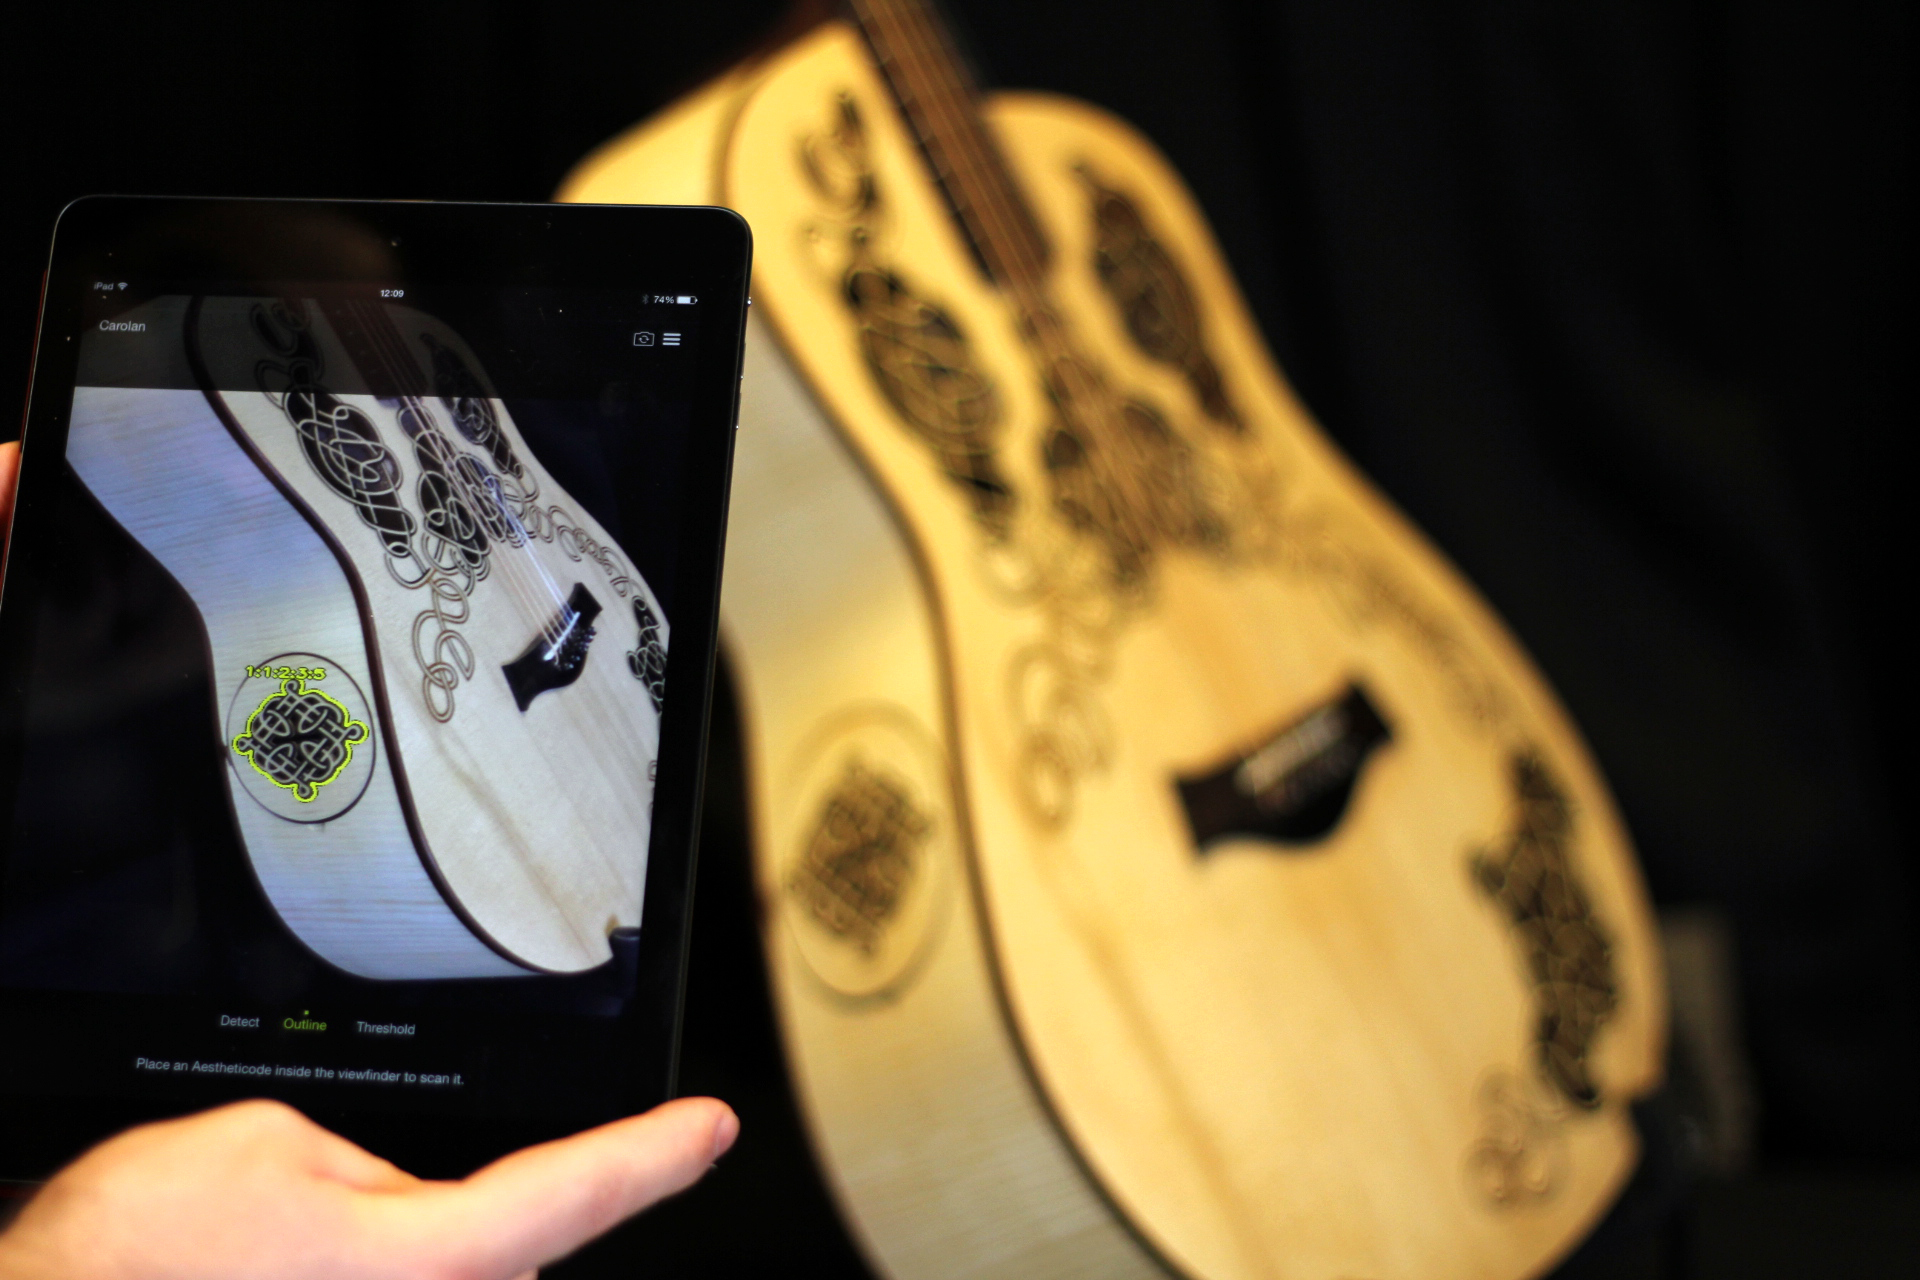
Top sound hole code being scanned
This brings us finally to the soundboard and the most complex face of the guitar by far. There are multiple codes covering an extensive area, a mixture of engraving, inlay, large numbers of cut out sound holes, and thin decorative work. This was a serious undertaking for Nick as he had to balance detailed engraving and inlaying, alongside maintaining the structural integrity of the all important resonant soundboard … all to a very tight deadline.
There are four codes on the soundboard. The outer three, although different designs, all have the same code value (1:1:3:3:4), the centre sound hole one being a different with the code value of 1:1:2:4:4. The process of ‘coding up’ the front of the guitar revealed why you don’t see a great deal of inlay work on the soundboard’s of acoustic guitars (apart from a potential impact on its resonant qualities). Typically soundboards are constructed from Spruce. Spruce trees grow very quickly in the summer months and very slowly over winter, and this has a significant impact on the densities of the wood grains (as can be seen in the image below). The growth over summer months produces a wide, soft layer of wood, whereas the winter grain is thin and consequently very dense. These distinct layers of soft and hard grains is exactly what makes Spruce ideal for guitar soundboards. In the construction process the direction of the grain always runs top to bottom, in-line with the neck of the guitar. This is where the wood is at its strongest, which is why the thin soundboard (with bracings) can support the enormous tension that the strings exert. Conversely, looking at the wood as it runs across the width of the guitar – from side to side – there is a lot of flexibility due to the thick soft ‘summer’ layers and this is what allows the wood to resonant so well.

A piece of laser engraved Spruce showing its hard winter grains
This all sounds great so far doesn’t it! Well it is until you try and laser engrave Spruce and inlay wood into it! The laser cutter does not discern between soft and hard, it burns at the power setting you choose. Consequently, the laser cutter engraved the soft ‘summer’ wood out, but left hard thin ridges of the ‘winter’ wood largely intact. This meant that Nick had to cut and chisel out each ridge of hard grain by hand before inlaying it without damaging any of the surrounding soft non-engraved areas. This was a huge undertaking given the extensive level of engraving and inlaying we had designed into the soundboard. Nevertheless, Nick got his head down and persevered.

The engraved areas have been cleaned of their ridges, and some inlay has been fixed in place
This section was completed with some minor disturbance to the soft grains which neighboured the engraved sections. The dark Indian Rosewood was then inlayed to form the codes. When first fixed in, the inlay sat slightly proud of the soundboard requiring it to be planed down, an equally challenging process that created a string of complications. The force needed to plane the hard Rosewood then started to damage some areas of the soft Spruce; Nick was in an unavoidable situation of just having to proceed as carefully as he could. The majority of the inlay decoration and three of the four codes on the soundboard were finished well and scan effectively, but the code situated at the lower / top does not scan, due to some unavoidable damage to the thin Spruce lines in that code. We took the decision to move ahead with this to take the project forward (the alternative requiring a significant deconstruction of the guitar and a new soundboard to be re-engraved and inlayed). Fortunately, the affected code was one of the three duplicates, so it did not affect the functionality.

Nick planing down some inlay on the soundboard
As mentioned above, when discussing the sound hole code on the top side, light pollution into the sound holes was a potential concern, particularly with those on the soundboard. We agonised as to whether we should stain or veneer the inside of the guitar a dark colour, to reduce the reflection of light out from the sound holes. To do this would have gone against convention; traditionally, the inside is left in a natural state, showing the wood that forms the back and sides of the guitar. Given that we could return and stain the inside after the construction of the guitar – access via the removable sound hole on the top side – we decided to leave the inside as it is. In practice the sound hole codes on the soundboard do scan, but strong directional light flooding into the holes will break the code. Notably, the closer the mobile device gets to the code, the greater the negative impact of light pollution

In this photograph, you can see light reflecting out from the inside of the centre and lower / top code. Whereas the holes in the upper / top code show no reflection
Lighting conditions can also impact on all of the codes, not just the sound hole ones. For instance, strong shadows cast across a code can break it. Interestingly, it is often the person or the mobile handset the person is holding that casts the offending shadow! When the lighting is largely flat – dim or bright – the scanning process is consistent, but strong contrasts in lighting increase the chances of disruptive shadows. As yet, we have not tested under stage lighting, where colour contrasts will be thrown into the mix!
On reflection, we are happy with the scanning functionality of the codes, considering the idiosyncrasies of the materials, designs and the crafting process of the luthier. A natural extension to this blog post, which we will pick up in a future post, concerns usability rather than construction, namely what happens when people encounter the guitar for the first time and try to scan it.

Reblogged this on stevebenford and commented:
Reflections on the craft challenges of embedding interactive codes into delicate wooden structures
LikeLike